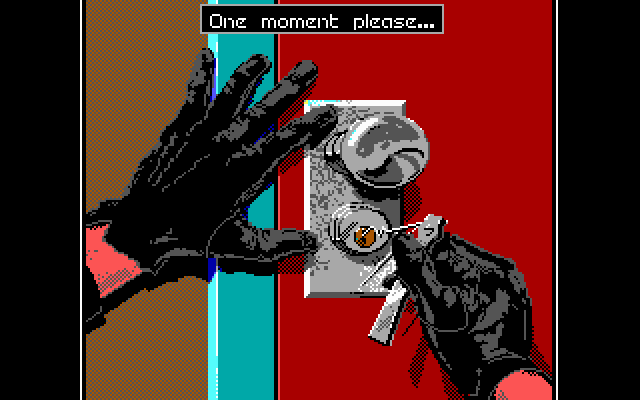
Prelude cutscene to a Break-In.
A Break-In is one of the most common activities Max can perform during a game of Covert Action. It describes the act of entering an Organization's Hideout for the purpose of collecting data, Arresting an enemy agent, or Confiscating an item - and sometimes all of these simultaneously. Though it is not the only way to collect data, it is the only way to perform a Confiscation. Arrests can still be performed by watching the building then succeeding at the driving mini-game.
A Break-In is performed by playing the Combat Mini-Game. Unlike other instances of that Mini-Game, It is considered "successful" only if Max manages to exit the building without being Captured by the enemy guards. However, it is less than successful if Max is Wounded in the process, as this incurs an extra time penalty as Max has to recover from her wounds.
Overview[]
During Max's Mission, she is expected to gather information about the current Criminal Plot and discover the locations of all agents involved in the perpetration of that Plot. This can be done in many ways, from installing Wiretaps to decoding Message Traffic.
However, to actually prevent the Plot from succeeding, it is necessary at some point to take matters a step further - Arresting participants and Confiscating Items. There is no other way to do this except to bust into a suspect's Hideout and manually remove him or his items. In addition, collecting data from inside a suspect's Hideout is by far the most efficient form of information-gathering to boot, so a Break-In is not simply the final tool in your investigation, it's downright the most useful one at any given time!
A Break-In is played as a Combat Mini-Game. Unlike with other Combat situations, Max gets to pick the Gear she'll carry with her on a Break-In. This Combat also takes place inside a building, and Max needs to navigate between the different rooms, negotiating obstacles and avoiding (or killing) enemy guards patrolling throughout the place.
There is a wide range of activites that can be performed inside an enemy hideout, making this Mini-Game the most versatile of all. Max can seek out Containers and Photograph their contents. She can install Bugs in the different rooms to provide future surveillance. She can Hack computer Terminals for specific information. And of course, she can Arrest the agent residing in this hideout (if there is one) or Confiscate any Items in the possession of that agent (if any).
For this reason, the game sets no actual "Goal" to a Break-In. As far as it is concerned, the Break-In is a success if you manage to get out of the building without being Wounded (or worse - Captured). It's really up to the player himself to decide what he wants to accomplish during the Break-In, and thus gauge his success based on whether or not he managed to do everything he set out to do. Still, getting out of the building without being Wounded is usually a good measure for how well the Break-In went anyway.
Initiating a Break-In[]
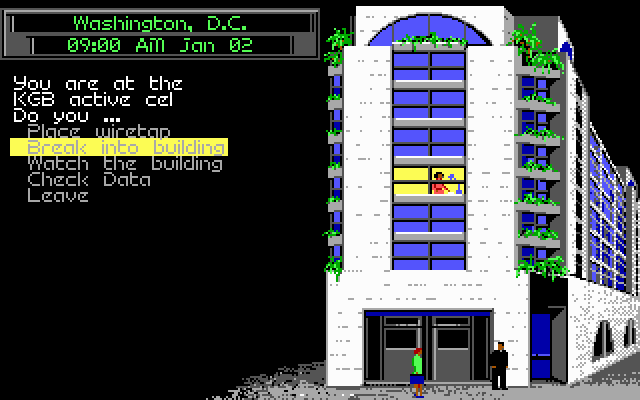
Selecting the "Break into Building" option initiates the Break-In Mini-Game.
To start a Break-In, visit the Hideout you wish to break into.
The Hideout Menu will show "Break into building" as the second option. Choose this option to begin your Break-In.
Upon selection of this option, the game clock will advance by one hour automatically. Note that it will also advance after the break-in is completed (see below).
Gear Selection Menu[]
- Main article: Gear Selection
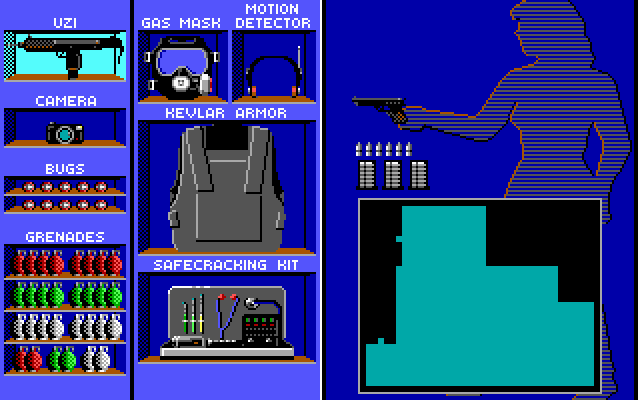
The Gear Selection menu before a Break-In.
A Break-In is the only instance of the Combat Mini-Game where Max gets to choose her own Combat Gear. You do this in a special interface appearing just before the Break-In begins.
Max can choose up to 5 different pieces of Gear, from a fairly wide selection of items. The selection includes an Uzi, Kevlar Vest, Grenades, a Camera, a Safe Cracking Kit, a Gas Mask and a Motion Detector. Your choice should correspond to the goals you've set for yourself for this particular Break-In. For instance, information collection is practically impossible without a Camera (unless you're just hoping to Hack Terminals). For a quick "nab-the-agent" break-in, you might want to arm yourself with combat gear.
To end the Gear-Selection stage, press the "ESC" key. The game will not warn you for choosing less than the allowed 5 pieces of Gear, so make sure you've packed everything you need before pressing the "ESC" key.
Choosing a Door[]


Selecting which door to break-in through.
Once Gear Selection is completed, the game may ask you to choose which door you want to enter through - assuming the building has more than one entryway.
You can consult the Combat Mini-Map in the lower-right corner of the screen for this, though if this is your first Break-In at this specific Hideout, you may just have to guess which door would be better, based on your experience with various building Layouts. Otherwise, you may already have some idea about which door is best to try.
Layout and Exploration[]
- Main article: Layout
During a Break-In, the Combat Mini-Map at the lower-right corner of the screen shows a floor plan of the entire Hideout.
When executing your first Break-In at a given Hideout, the map will only show the shape of the building itself, with an indication of the location of each exit. To reveal the actual layout and contents of each room, Max must explore the Hideout in person.
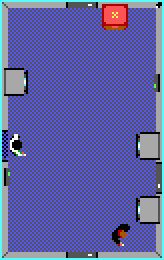
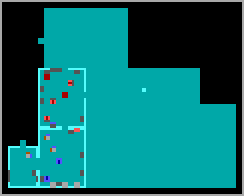
The Mini-Map, once several rooms have been explored.
Each room you enter will immediately have its layout displayed in the proper place on the Combat Mini-Map. The map will show the shape and size of the room, any doors leading in and out of the room, as well as the layout of the Furniture. This can be very useful for plotting your way between the various rooms as you go, and can be used as a general indicator of the type of each room.
Of course, the room you're currently inside at any given time is shown in the large display on the left half of the screen. This is where you actually move Max herself, combat enemies, and interact with the various Furniture pieces you come across.
Exiting the Building[]
To end the Break-In, simply move Max through any of the external doors leading out of the building.
The game will then perform the following, based on what transpired during the Break-In:
- If Max has just Arrested the agent who lives in this Hideout, you'll be taken directly to the Interrogation cutscene, to proceed with the questioning of the victim.
- If Max was wounded during the Break-In, the game will either send you to the "Recover from Wounds" cutscene. This cutscene advances the clock by anywhere from 4 to 12 hours, depending on the number of Wounds suffered. Note that this does not occur if an Arrest was also performed (see above).
- If Max left the building without making an Arrest or being Wounded, the clock will simply advance by a number of hours equal to the amount of time Max spent inside, plus 2 hours. Max will then be "deposited" back at the Hideout Menu and can continue her investigation immediately.
Activities[]
A Break-In allows Max to perform a wide variety of actions. It is possible to collect information in two different ways, you can install Bugs to increase Surveillance Quality at this Hideout, and can even Arrest the agent residing here or Confiscate any items in his possession (if any).
For some of these activities, Max will need to be carrying the correct piece of Gear. Others can be performed even if no Gear is carried at all.
It's usually a good idea to decide beforehand what your goals for this Break-In would be. This influences decisions related both to Combat Gear as well as your navigation through the Hideout and the various tactics you'll want to use inside.
Photography[]
- Main article: Photography
The primary way for collecting information inside a Hideout is through Photography - taking pictures of documents found inside Containers, such as Cabinets, Desks and Floor Safes.
Containers are usually abundant in every Hideout. When one is found, Max must open the Container by walking up to it and pressing the "ENTER" key. An open Container can then be photographed by pressing the "F2" key. It is also important to close the Container after photographing its contents to avoid alerting enemy guards - this is done with a second press of the "ENTER" key.
Naturally, to take any photographs during a Break-In, Max must be carrying a Camera ![]() . Also, Max must have at least one remaining cel of film - one is used up every time a photograph is taken.
. Also, Max must have at least one remaining cel of film - one is used up every time a photograph is taken.
Also note that some containers are Locked, and cannot be opened (or close!) unless Max is carrying a Safe Cracking Kit ![]() . A closed container, whether Locked or otherwise, cannot be photographed.
. A closed container, whether Locked or otherwise, cannot be photographed.
Photography can yield all sorts of information, such as Mentions, Clue pieces, and Hard Evidence. The type of information yielded by a Container is randomized when it is photographed, so there is no way to force a particular piece of information to appear.
Each Container may only be photographed once per Break-In. However, if you leave the building and break in again, you can photograph the same Container again for a new (randomly selected) piece of information.
Note that there is one type of Container, a Floor Safe, which yields different (and extremely valuable) information unlike other Containers. If a Floor Safe exists in a Hideout, it may in itself be a good enough reason to carry both a Camera and a Safe Cracking Kit!
Installing Bugs[]
- Main article: Bug
If Max locates a Hideout belonging to a suspected Participant in the Plot, Max can attempt to place Bugs inside this Hideout in the hope of recording Message Traffic and Meetings occuring at this Hideout.
Bug Installation is an alternative to Wiretapping as a method of increasing your Surveillance Quality at a given hideout. It is a useful method when Max has ample Combat Skill but is lacking in the Electronics Skill required to perform a successful Wiretap.
To install Bugs, Max must first select them from the Gear Selection menu before the Break-In begins. You'll be given a set of 10 bugs.
Actual installation of a bug involves locating a piece of Buggable Furniture, usually a Couch or a Plant, which are abundant in all Hideouts. Walk up to this furniture and press the "F3" key to install the bug. This of course requires that you have at least one Bug remaining in your inventory.
Only one bug may be installed in any room, even if that room contains more than one piece of Buggable Furniture. This limit only applies within the context of a single break-in - the game will "forget" which rooms have already been bugged the moment a Break-In ends.
The actual effects of Bugging are not immediate - they will only be apparent once the agent residing in this Hideout sends/receives a message or conducts a Meeting here. If so, the Surveillance Quality (which is augmented by the bugs) determines how likely you are to detect the occurence of the message/meeting, and the likelyhood of recording the contents. Successfully recording a message or meeting can by itself be a valuable asset, revealing a significant amount of information about everyone involved in the event.
Note that the location where each Bug is placed inside a hideout is based on the type of Room it is placed in - not the type of Furniture! For more on this, refer to the article on Bugs.
Hacking Terminals[]
- Main article: Hacking
Another method of information-gathering is to find a Terminal and Hack into it. This is very different from Photography in several ways - primarily that this is a way to get information about a specific subject.
Hacking a Terminal is done in two distinct steps: First, Max locates several Terminals and collects a single letter to the current Password from each Terminal. Once Max is sufficiently certain what the Password is, she goes to any Terminal and accesses it using that Password. Then, she puts in a query about the subject she's seeking information on. If the Terminal contains the relevant data, it will be given to Max and recorded automatically in her Documents as required.
To perform a Hacking, first locate one or more Terminals in the Hideout. Walk up to one, and press the "ENTER" key to retrieve one letter for the current password. The collected letters are displayed over the Combat Mini-Map. Note that only one letter may be retrieved from each terminal for the entire duration of the Break-In. It will not yield another letter until you leave the building.
Once you're fairly sure what the Password is, walk up to any of the Terminals, and press the "F4" key. A prompt will ask you for the Password, which you must input. If it was the correct password, you'll be prompted to enter a Query - the name of the Person, Place or Thing you're looking for information about.
Unlike Photography, this method of collecting information does not require any special Gear. However, Terminals are much less common than Containers, and it is possible for a Hideout to contain few of them or none at all. This is important because without an ample amount of Terminals, it can be impossible to collect enough letters to guess the current Password - making Hacking impossible.
However, Terminal Hacking is an extremely accurate way of acquiring information. Max has to query the Terminal about a specific person, place or thing, and will receive information pertaining only to that subject. So, unlike photography which yields all kinds of random information, Terminal Hacking yields exactly what you're looking for. Of course it also means you need to know what you're looking for when attempting it!
Arresting Agents[]
- Main article: Arrest
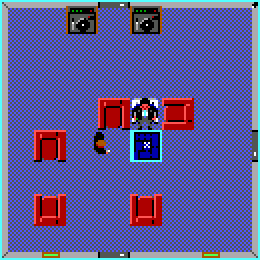
In the Agent Room.
If the Hideout you're currently in contains an Agent, that agent can be physically found in one of the rooms in that Hideout. This is called the Agent Room.
At some point during your investigation, you'll want to start Arresting the various participants in the plot. This is basically the goal of each Mission you play - to arrest as many of them before they can carry out their Plot or disappear into hiding.
To do this, find the agent's Hideout, navigate your way to the Agent Room, and walk up to the agent himself. Press the "ENTER" key, and confirm the Arrest when prompted to do so. The agent will be "nabbed" out of the chair he was sitting in. If you can make your way out through one of the building's exits, the Arrest is completed, and you'll be taken directly to the Interrogation cutscene, where hopefully this agent will reveal everything he knows.
Remember that to make an Arrest "stick", you need to know the agent's Role in the plot. Without that knowledge, the agent will be released and will go right back to where you found him - in the Agent Room in his Hideout. Also note that if an agent is marked as "NOT INVOLVED" or "Red Herring", they will always be released during interrogation.
Turning Agents[]
- Main article: Double Agent
It is possible to turn Participants into Double Agent. This requires making an Arrest, as described above. However, to turn an enemy agent, you must first acquire Incriminating Evidence about this agent.
Such evidence can only be acquired from Floor Safes ![]() , which do not always appear in every Hideout. Also, due to the random nature of collecting evidence from Containers (Floor Safes included), it's not guaranteed that any such safe will yield Incriminating Evidence at all. Also, to even qualify for the chance to get this evidence, you must already know the agent's Role in the current plot. It is impossible to turn Red Herrings into Double Agents.
, which do not always appear in every Hideout. Also, due to the random nature of collecting evidence from Containers (Floor Safes included), it's not guaranteed that any such safe will yield Incriminating Evidence at all. Also, to even qualify for the chance to get this evidence, you must already know the agent's Role in the current plot. It is impossible to turn Red Herrings into Double Agents.
The Incriminating Evidence must be collected during the same Break-In in which the agent is Arrested. If you leave the Hideout after collecting this Evidence without making an Arrest, the Incriminating Evidence is automatically lost - you would need to acquire it again if you wish to Turn the agent.
If you have time to spare, try to examine all Floor Safes before making the arrest. If Incriminating Evidence does not show up, leave and break-in again in the hope that it will turn up this time. This can be repeated as long as the Agent doesn't go into hiding.
Turning an agent instead of simply Arresting them has several extremely useful benefits, and is well-worth the effort of trying to acquire Incriminating Evidence about that agent. Read the article on Double Agents for more information on this.
Confiscating Items[]
- Main article: Confiscation

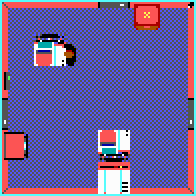
An item is Confiscated.
If an agent is in possession of one or more Items at any point during the Mission, those items can be Confiscated when Breaking Into the agent's Hideout.
The Item(s) can be found lying on the floor in front of the agent himself, in the Agent Room. If the Item is not there, then it is simply not in the possession of the agent. Either the agent has yet to acquire or receive the item, or he has already managed to deliver it to another agent.
The Confiscation itself is pretty straightforward: find the Agent Room, walk up to the Item, and press the "ENTER" key. This will "close" the item and put it in Max's inventory. Once you leave the Hideout, the item is considered Confiscated (read the Confiscation article for more details on what this does).
Note that if Max leaves the Hideout with at least 1 Wound, you'll be treated to the "Recover from Wounds" cutscene, and will lose the Item immediately. If this occurs the Item will be placed back where it was found. However this will not occur if you also Arrest the agent himself during the same Break-In - whether or not the Arrest sticks.
Combat Mini-Game Particulars[]
Although a Break-In is done in the Combat Mini-Game, there are several important differences between it and other instances of Combat, such as during a Prison Break or an Ambush.
The differences here are all geared around the ability to use Stealth instead of brute-force tactics during a Break-In. As long as you can manage to avoid triggering the Alarm, enemy guards will not come looking for you - making the progress of your Break-In much easier.
The Alarm[]
While the alarm is active, the screen flashes red.
Each Hideout you Break-Into has an alarm. It is initially set to "OFF", and as long as that is the case, enemy guards will not come looking for you.
There are several cases when the alarm will go off:
- When recognized by a guard.
- When a guard spots an open Container.
- When a guard spots the dead body of another guard.
- When a Frag or Stun grenade detonates.
- When entering the Agent Room.
- Whenever a guard walks through the Agent Room while the agent is missing (I.E. has been picked up by Max during the current break-in).
- When feeding the wrong Password into a Terminal.
- Occasionally, when Terminal Hacking is concluded successfully or otherwise.
When this occurs, the screen will begin flashing red. In addition, the game will play an alarm noise for a few seconds. The noise is only to alert you that the alarm has gone off - it is still activated when the noise dies, as long as the red flashes continue!
The Alarm remains on for a set period of time - usually around 15 seconds or so, depending on the speed at which the Mini-Game is running. If one of the above conditions occurs while the alarm is already activated, the alarm timer will be reset, and it will run for another 15 seconds or so from that point. This can potentially keep the Alarm going indefinitely.
If you manage to avoid the above situations until the alarm dies down, everything returns to normal, as though it never occured.
Enemy Guards[]
Unlike in other combat situations, enemies in a Hideout during a Break-In behave differently - as long as the alarm is not activated:
- A specific number of Guards is spawned at the start of each Break-In. This depends mainly on the current Hideout Alert level.
- Guards walk around randomly. They are not actively looking for Max.
- Guards cross from room to room as part of a random patrol pattern. A guard might potentially visit each and every room in the Hideout during his patrol.
- Guards may open doors to look into other rooms (in which case they will then close the door without going into that room.
- Guards may approach a piece of Furniture and inspect it. If this is a Container or another piece of Furniture that can be opened, the guard will open it, linger there for a few moments, then close it and walk away.
Guards may trigger the alarm themselves, if they notice something particularly wrong during their patrol. For example, they will raise the alarm if they ever spot an open Container. Also, they will immediately raise the alarm upon spotting the dead body of another guard.
More commonly, guards will raise the alarm if they spot Max himself. This takes them a certain amount of time, based on the current Difficulty level versus Max's Combat Skill. If line-of-sight is broken quickly enough, or the guard is shot dead before he can react, the alarm is not raised.
Line-of-sight can be broken in several ways, especially by hiding behind Furniture. Some pieces of furniture (such as Cabinets) will hide Max regardless of whether she is Standing or Crouching. Other pieces are shorter, meaning Max must crouch down if she wishes to hide behind them. If the guard cannot see Max, he will simply continue on his way without raising the alarm.
Once the alarm is raised, Guards behave very differently. For one, they will all head directly to the room where Max was at the time the alarm was raised. When they reach a door to this room, they may even lob a Grenade inside to try and stun or Wound Max before they move in for the kill. If Max isn't there, they'll proceed to search the adjacent rooms.
Also note that each time you raise the alarm, a number of Guards is automatically spawned. It is currently unclear how many guards will spawn, but it has a certain relationship with the current Hideout Alert level at this building. Also, the number of guards that can be spawned is finite - kill all of them, and the Hideout will remain without any guards even if the alarm is raised! This limit is reset once you leave the building, so it will not remain unguarded if you break-in again.
Disguise[]
- Main article: Disguise


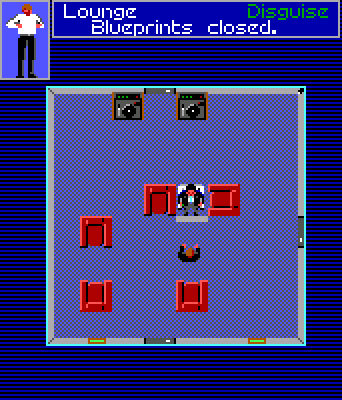
Max wearing a Disguise.
Also unlike other Combat situations, during a Break-In it is possible to acquire a Disguise.
This is done by killing a guard and walking over their corpse. Their disguise is collected along with a pair of Grenades. This only works if the alarm is not activated (screen flashing red) at the time, otherwise only the grenades are collected.
While in Disguise, the guards ignore Max as long as her back is turned towards them.
A Disguise lasts until the next time the alarm is raised, or until leaving the building.
While wearing a Disguise, Max can do two things that are otherwise impossible:
- Guards will not "recognize" Max, unless they have a good look at her front or side for a period of a few moments. A guard can pass right next to Max without batting an eye as long as he can't see her front or side.
- Max can walk through the Agent Room without raising the alarm - again assuming that no enemy guard who might be passing through the room can get a good look at her.
If the alarm is raised for any reason, Max will immediately lose her disguise. Of course, it is possible to pick up another disguise once the alarm dies down.
Capture[]
- Main article: Capture
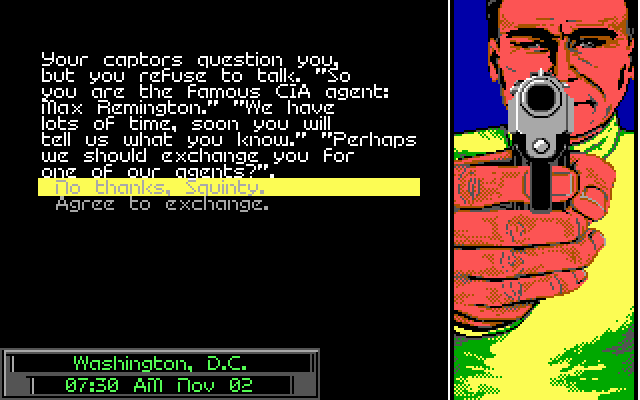

Captured by the enemy!
If Max receives a certain number of Wounds during any Break-In, she will immediately be knocked out and Captured by the guards.
You'll then be offered a choice: either agree to an Exchange of agents in return for your freedom, or be held hostage by the enemy at this Hideout. Either choice is bad - an Exchange can free an agent you've worked hard to Arrest, or add a few more CIA Double Agents in random CIA Offices around the map. Refusal to an exchange will strip Max of all her Gear, and cost her upwards of 24 hours as she struggles to escape her bonds.
If you do choose to try to escape, you'll be placed in one of the rooms inside the same Hideout, with no Gear other than possibly a Kevlar Vest and a Pistol. You then have to try and make your way out of the Hideout without being Captured a second time (and hopefully without being Wounded at all), with the alarm blaring all throughout this mini-game.